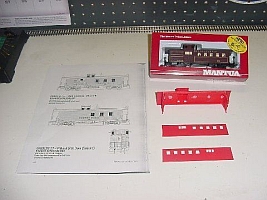

For this project, you will need two Mantua Cabooses; one will be the donor car. Quite often you will find these cabooses on eBay that are reasonably priced (they are typically listed as "Mantua Old Time Caboose"). I prefer to buy one in two different colors as this will serve as a visual aid in assembly.
 First, simply use an X-Acto knife and cut the roof off at the upper top of the letter board on both cabooses. Keep the ends attached to the roof, as it will make the process much simpler to reattach, and align the sides later on. Use light strokes on the first couple of passes, then you can put more pressure on the cut as needed. Be sure to take your time on this process.
Once you cut the roofs off both cabooses, with both caboose ends still attached, use these plans to establish the length of the caboose, and for placement of the windows and side doors. If you donít have a NWSL Chopper II, I highly recommend you purchase one along with a NWSL True Sander. They both will save you a lot of time in the long run, and make perfect cuts needed to make the sides look seamless. Once the cuts are made (see photo), butt the cut pieces together and hold them together using a 3/4" piece of masking tape, sticky side up, to establish the correct length of the caboose. Once that is done, glue (I used thin Tamiya Extra Thin Cement) at each cut and let it seep into the seam. Once dry, carefully remove the tape and apply a piece of .010" strip styrene to the middle, just below the windows for added support. Keep in mind, once you reattach the sides to the roof, you will have plenty of support from the roof as well as the optional .010" x .125" letter board.
For the roof, use the plans to get an idea of the placement of the cupola. Keep in mind you have already established the length of the sides in the step above. Once you feel comfortable with the length and the cupola location, mark where your cut will be on the roof (see photo) then simply snap the cupola from its position. Donít worry, it pops right off. Use a miter box and cross cut saw to cut the top in two, and square up the ends. Now take the sides and test fit it to the top, sand and trim as needed. I might note I used tape to hold the roof together while test fitting the sides to the top. Once you feel comfortable with the fit, spot glue the sides and the top together.